versaAssets
Video Tutorial
Overview
Assets can be scanned and managed in versaSRS as well as associated with Records (Cases, Problems, RFC's, Tasks). Assets can be added manually, imported, or discovered on the network by the versaAssetsAgent Companion Tool. Any User who has the Can Manage Assets checkbox ticked within their User Profile is able to manage Assets within versaSRS.
To access the Assets select the Asset Search icon from the versaSpinner - Manage tab.
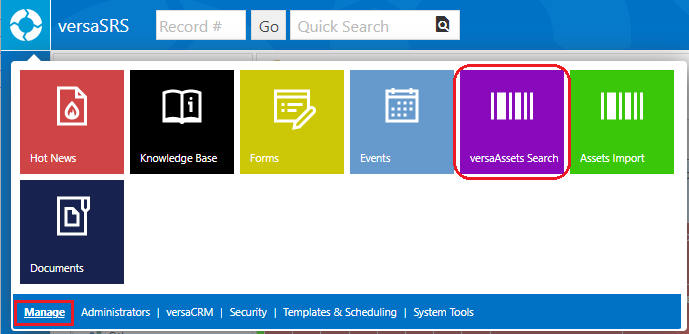
This will display the versaAssets Search window within the Preview Pane.
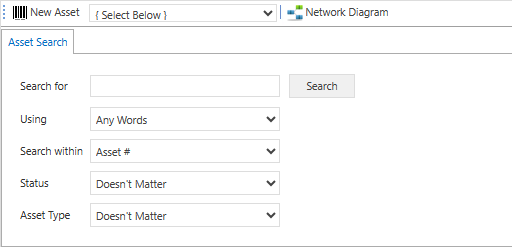
On the Asset Search window Assets can be searched for, then edited by double clicking on the Asset. New Assets ( ) can also be created here, and the Network Diagram viewed.
When an Asset is opened the Asset Window will be displayed which contains several fields and tabs to categorise and display information about the Asset.
The Asset Audit History will be visible across all tabs within the Asset Window.
The following will outline the tabs and fields available within each Asset. The OK, Cancel, and Apply buttons exist on every tab, they are used to facilitate the "Save and Exit", "Exit", and "Save" functionality that is available within the Record views.
General tab
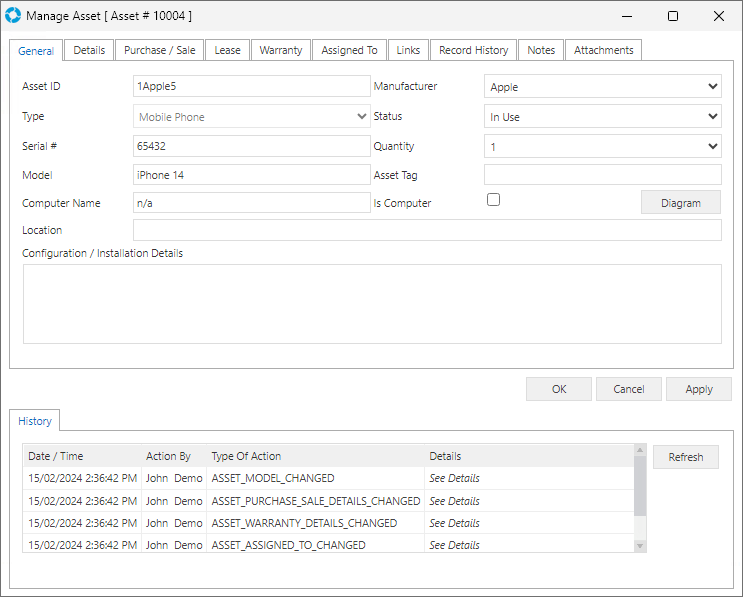
The General tab shows key details about the Asset; the following fields are available:
| Field | Description |
|---|---|
| Asset ID | The main Asset ID / Name of the Asset |
| Manufacturer | Drop down list depicting the manufacturer of the Asset. You can add or edit the available Manufacturers via the System Tables drop-down option versaAsset Manufacturers. |
| Type | The type of the Asset, cannot be changed once set. You can add or edit the available Types via the System Tables drop-down option versaAsset Types. The Details tab for custom Assets is the same as the Default. |
| Status | What state the Asset is in currently. You can add or edit the available Statuses via the System Tables drop-down option versaAsset Status. |
| Serial # | The Serial Number of the Asset |
| Quantity | The Quantity of the Asset |
| Model | The Model of the Asset |
| Asset Tag | Free text for the Asset Tag |
| Computer Name | The name of the computer (if it is one) |
| Is Computer | Checkbox to depict if the Asset is a computer |
| Diagram | When clicked will display the Network Diagram for the Asset |
| Location | The location of the Asset |
| Configuration / Installation Details | Text area to record notes against the Asset for the Configuration / Installation Details |
Details
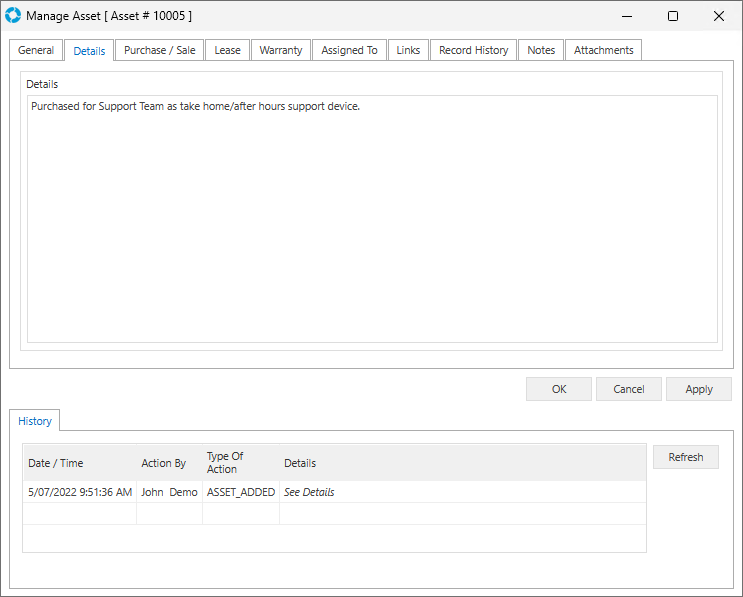
The fields that are available in the Details tab differ depending on the Type of Asset, each assignable type is mentioned below:
Default
| Field | Description |
|---|---|
| Details | Text area to add further information about the Asset |
Mobile Phone
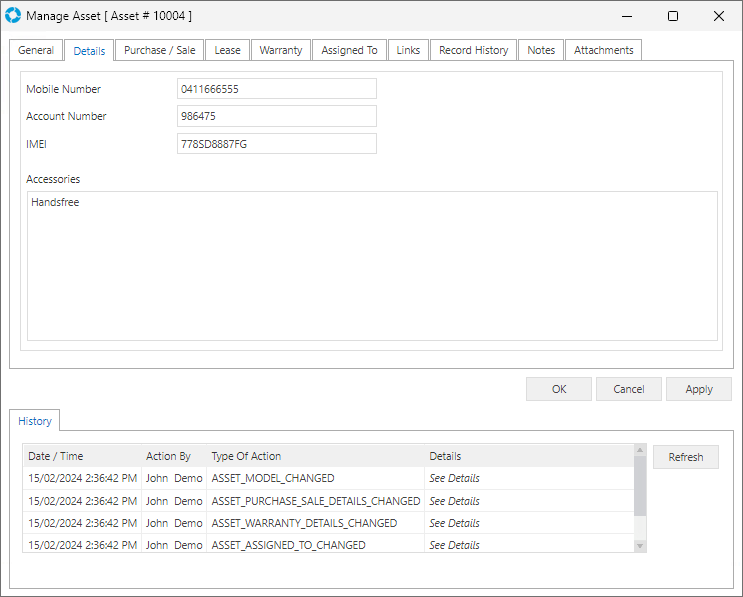
| Field | Description |
|---|---|
| Mobile Number | Number currently assigned to Mobile Phone Asset |
| Account Number | Account number for Mobile Phone Asset |
| IMEI | Number used by service providers to uniquely identify valid devices |
| Accessories | Text area to record any accessories for the Asset |
Software (Group)
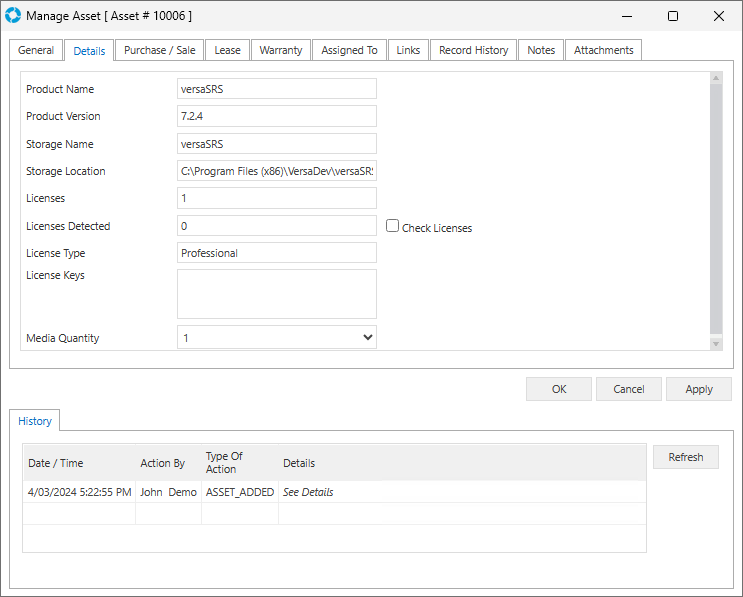
| Field | Description |
|---|---|
| Product Name | The name of the Product |
| Product Version | The version of the Product |
| Storage Name | The Storage name |
| Storage Location | The location the software is stored |
| Licenses | The number of licences associated with the Asset |
| Licenses Detected | Number of licences detected |
| Check Licenses | Checkbox indicating whether the licence(s) should be checked |
| License Type | The type of licence associated with the Asset |
| License Keys | The License Keys |
| Media Quantity | Drop-down indicating the number owned |
Purchase / Sale
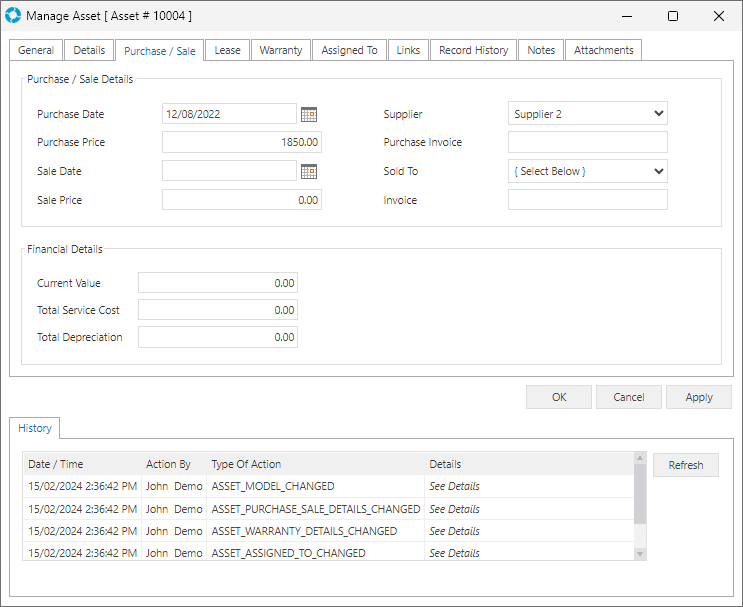
The following fields are available in the Purchase / Sale tab:
| Field | Description |
|---|---|
| Purchase Date | The Purchase Date of the Asset |
| Supplier | The Supplier of the Asset. If required these can be added to the System Tables interface which will allow you to add new (and edit) the available Supplier's. |
| Purchase Price | The Purchase Price of the Asset |
| Purchase Invoice | The Purchase Invoice of the Asset |
| Sale Date | The Sale Date of the Asset |
| Sold To | The person or company that the Asset was Sold To. If required these can be added to the System Tables interface which will allow you to add new (and edit) the available Sold To options. |
| Sale Price | The Sale Price of the Asset |
| Invoice | The Invoice for the Sale of the Asset |
| Current Value | The Current Value of the Asset |
| Total Service Cost | The Total Service Cost of the Asset |
| Total Depreciation | The Total Depreciation amount of the Asset |
Lease
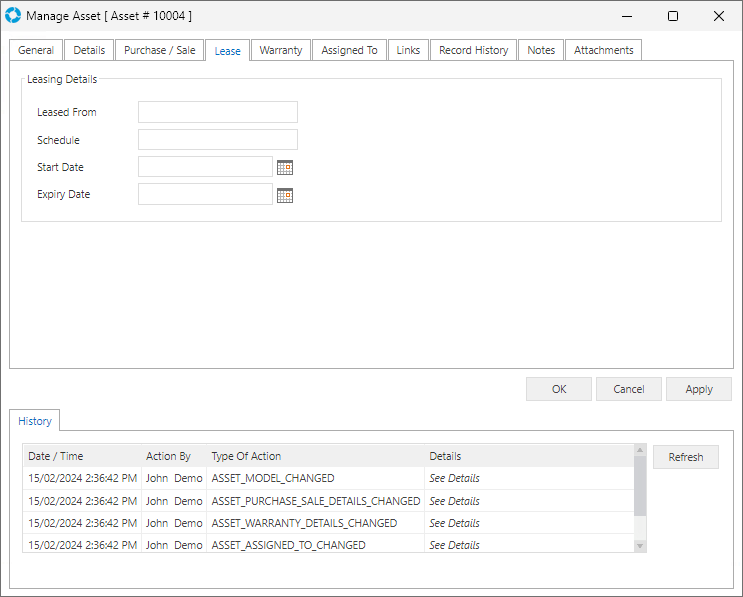
The following fields are available in the Lease tab:
| Field | Description |
|---|---|
| Leased From | Who the Asset was Leased From |
| Schedule | The Lease Schedule for the Asset |
| Start Date | The Start Date of the Lease |
| Expiry Date | The Expiry Date of the Lease |
Warranty
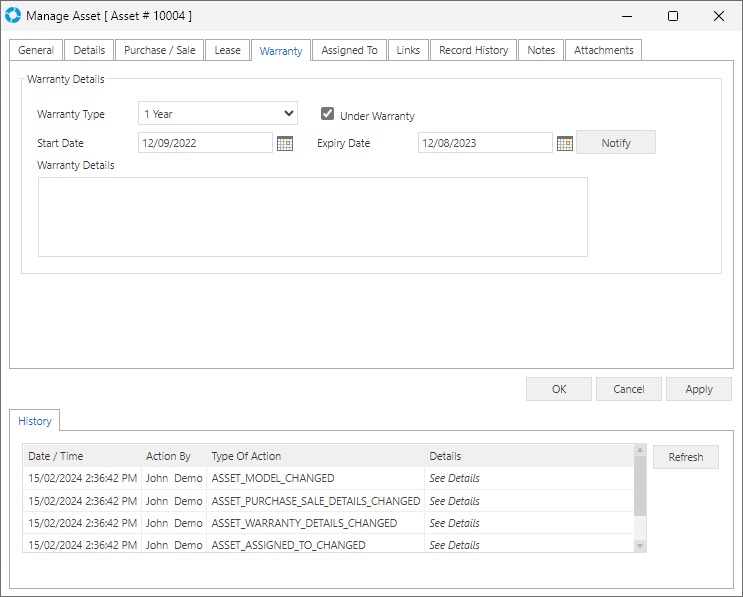
The following fields are available in the Warranty tab:
| Field | Description |
|---|---|
| Warranty Type | The type of Warranty associated with the Asset |
| Under Warranty | Checkbox indicating if the Asset is currently under Warranty |
| Start Date | The Start Date of the Warranty |
| Expiry Date | The Expiry Date of the Warranty |
| Notify Button | The Notify Button can send a Notification to a specified person or group when the Warranty is going to expire |
| Warranty Details | The Details of the Warranty |
Assigned To
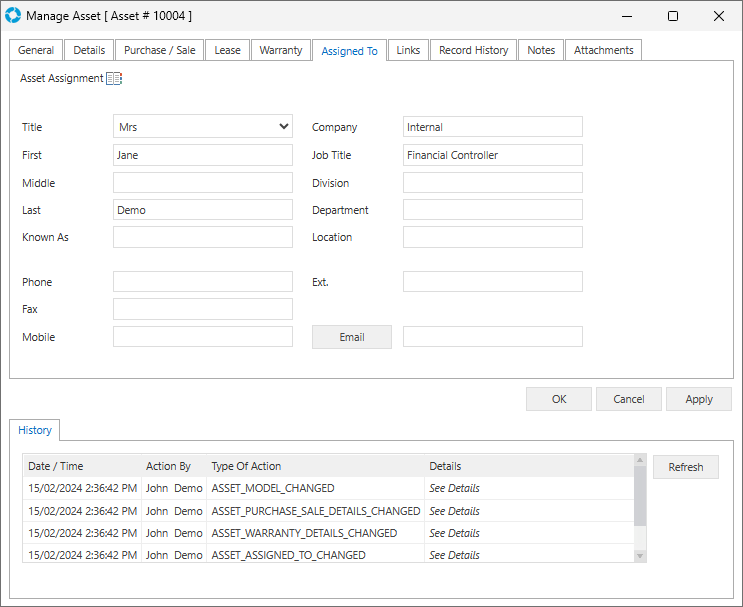
The following fields are available in the Assigned To tab:
| Field | Description |
|---|---|
| Asset Assignment | Allows the Asset to be assigned to a versaCRM Contact and auto-fill the fields with the Contact's available information |
| Title | The Title of the Assignee |
| Company | The Company of the Assignee |
| First | The First Name of the Assignee |
| Job Title | The Job Title of the Assignee |
| Middle | The Middle Name of the Assignee |
| Division | The Division of the Assignee |
| Last | The Last Name of the Assignee |
| Department | The Department of the Assignee |
| Known As | The Known As title for the Assignee |
| Location | The Location of the Assignee |
| Phone | The Phone Number of the Assignee |
| Ext. | The Phone Ext. of the Assignee |
| Fax | The Fax number of the Assignee |
| Mobile | The Mobile number of the Assignee |
| Email Button | Button to send Email to the Address specified (will open the default email client on your machine) |
| The Email Address of the Assignee |
Links
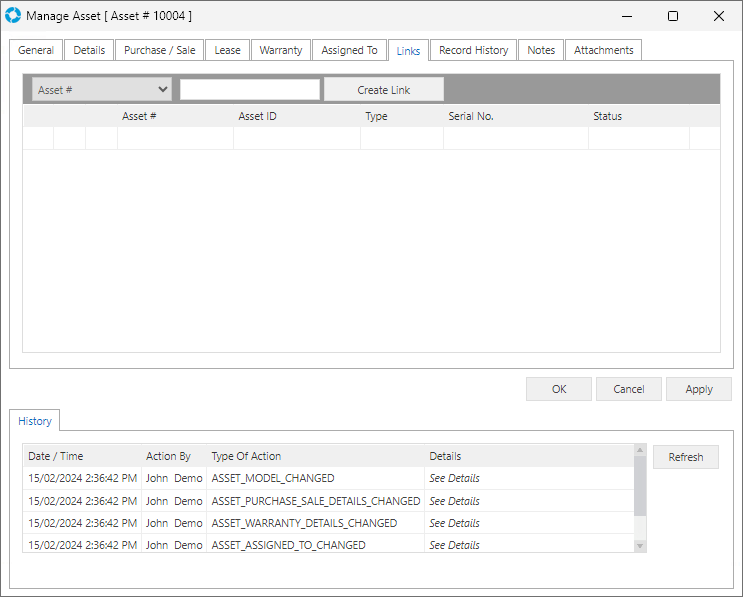
The following fields are available in the Links tab:
| Control | Description |
|---|---|
| Asset # | Specifies the field used to link the Asset |
| Asset # field | Text field to enter the Asset # to link |
| Create Link | This button will create the Link to the Asset based on the ID entered. There can only be one existing link per Asset, if a linked Asset is added as a link to an alternate Asset the original association will be removed. |
Record History
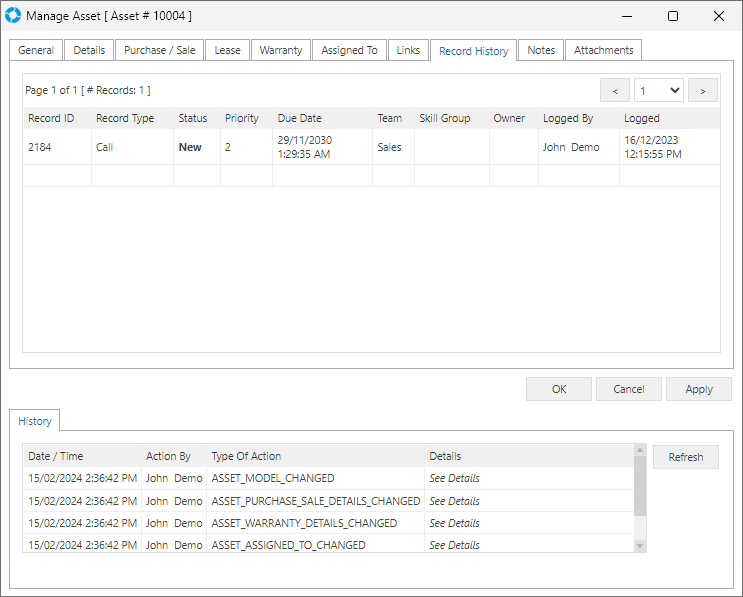
This displays the Records associated with the Asset.
The following fields are available in the Record History tab:
| Control | Description |
|---|---|
| Paging | Page left or right or select a page from the drop-down |
Notes
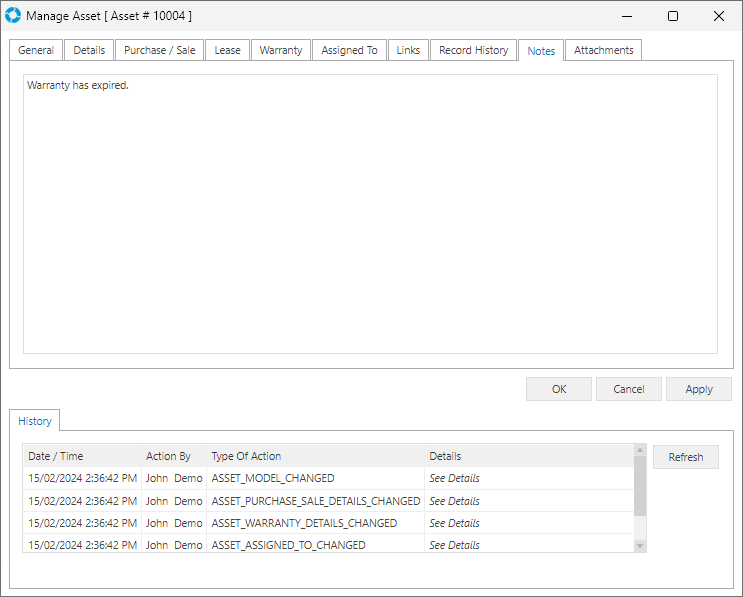
The following fields are available in the Notes tab:
| Field | Description |
|---|---|
| Text Area | Text Area to record notes against the Asset |
Attachments
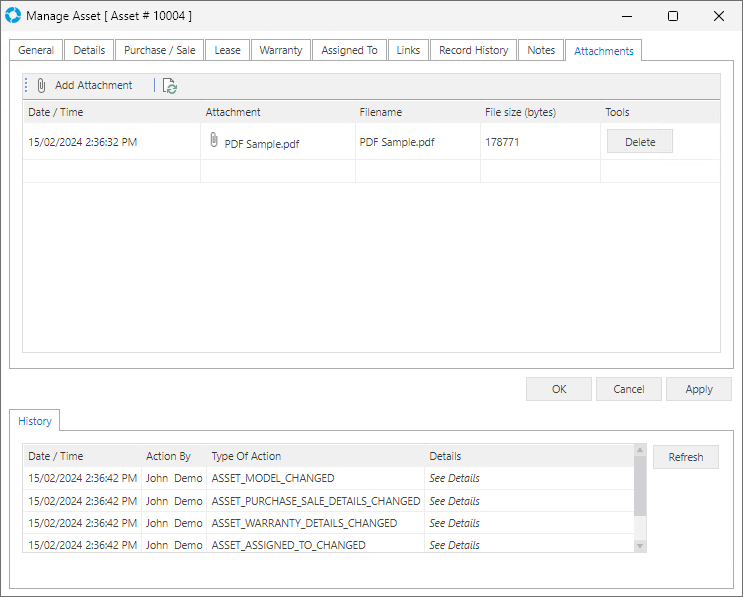
Allows attachments to be added to the Asset.
The following fields are available in the Attachments tab:
| Control | Description |
|---|---|
| Add Attachment | Button to add Attachments to the Asset |
| Refresh | Button to Refresh the Attachment list |