Installing the versaSRS Application
Hosting Requirements
Operating System:
- MS Windows Server 2022, 2019, 2016, or
- MS Windows 11, 10
Windows Features:
- Microsoft Internet Information Services (IIS) Manager
- Microsoft .Net Framework 4.8
-
IIS 6 Management Compatibility must be checked:
- Open "Control Panel" and ensure "View by:" is set to "Category".
- Click the "Uninstall a program" link from the Programs menu item.
- Select "Turn Windows features on or off" from the side menu.
- Expand Internet Information Services > Web Management Tools node.
- Check the "IIS 6 Management Compatibility" node. Ensure the nodes under this are checked as well.
-
Enable Windows Authentication, Forms Authentication, and Basic Authentication in IIS:
- Open "Control Panel" and ensure "View by:" is set to "Category".
- Click the "Uninstall a program" link from the Programs menu item (whilst in the Category view).
- Select "Turn Windows features on or off" from the side menu.
- Expand Internet Information Services > World Wide Web Services > Security node.
- Enable Basic Authentication, and Windows Authentication.
-
Enable ASP.Net:
- Open "Control Panel" and ensure "View by:" is set to "Category".
- Click the "Uninstall a program" link from the Programs menu item.
- Select "Turn Windows features on or off" from the side menu.
- Expand Internet Information Services > World Wide Web Services > Application Development Features node.
- Enable .NET Extensibility 3.5, .NET Extensibility 4.8, ASP.NET 3.5, ASP.NET 4.8, ISAPI Extensions, and ISAPI Filters.
Database Server Requirements:
Mailbox(es) Requirements:
- MS Office 365/EWS/Exchange Online, POP3, IMAP or OAUTH.
- SMTP - Host server should be enabled to relay mail
Hardware Requirements:
- CPU - 2Ghz (Minimum 1 GHz).
- Memory - 4GB (Minimum 2GB).
- Disk space - 100GB (Application 10GB; Database 90GB).
Integration - Where Required:
- Host Server connectivity to Active Directory.
- CRM Import Tool via spreadsheet.
- Assets Import Tool via spreadsheet.
- Import Cases via spreadsheet.
Installing the versaSRS Application
Unzip the contents of the Software Download Package to a folder or location on the Server where the versaSRS application is to be installed.
versaSRS is installed by means of a single wizard based installer and is named:
versaSRS_v7_0_0_setup.exe
Right click the versaSRS_v7_0_0_setup.exe file and select 'Run as administrator' to run the installer wizard.
Running the versaSRS Installer Wizard
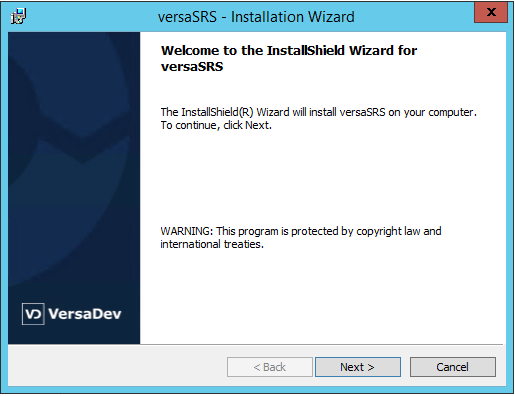
| Step 1: |
Welcome Screen. Click the Next button to start the installation process. |
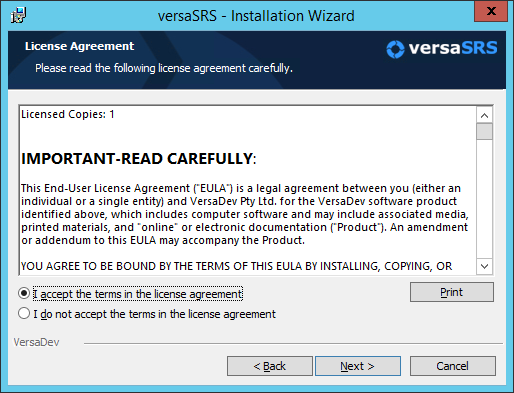
| Step 2: |
Accept the License Agreement. |
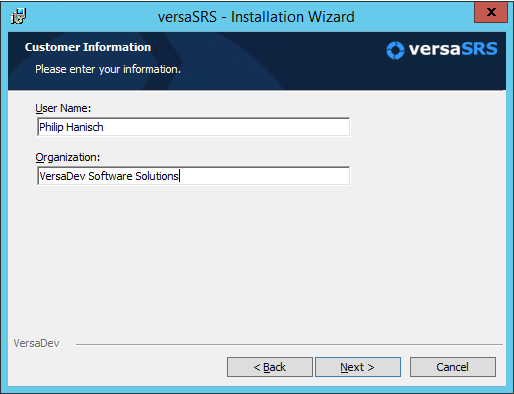
| Step 3: |
Complete the required User Name and Organisation. |
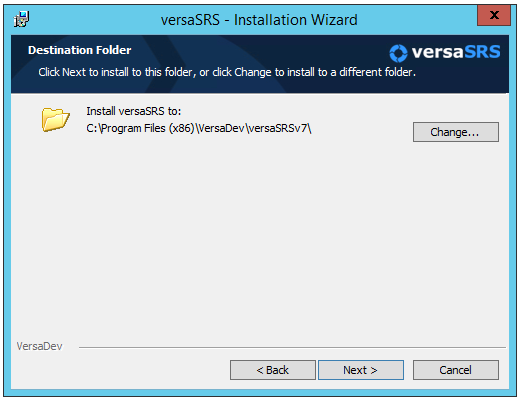
| Step 4: |
Use the Default installation folder path or click Change to select a new folder path. |
| Step 5: |
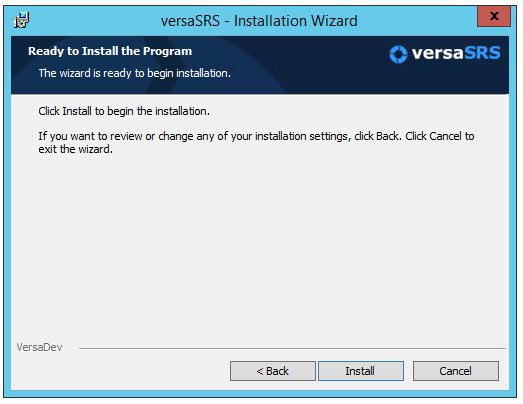
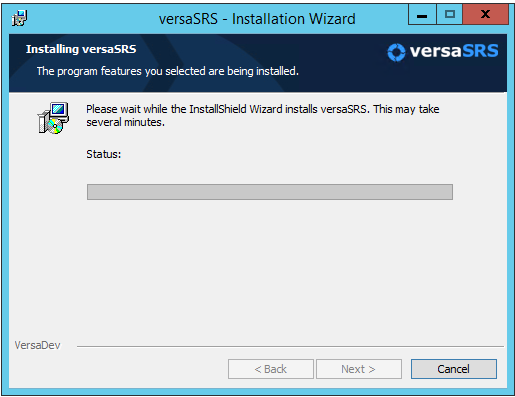
Click Next to proceed with the installation. |
| Step 6: |
Once the installation has completed, click Finish. |
| Step 7: |
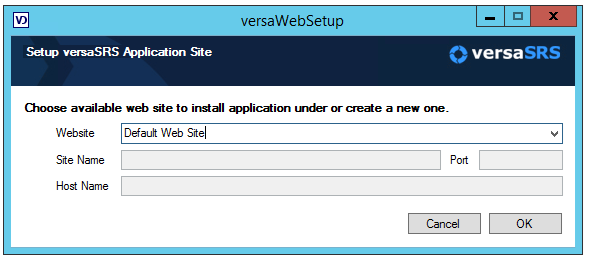
Now that the application files are installed, the website and components in IIS need to be created. Select the Website from the drop-down list. This can be the Default Web Site or a newly created website in IIS. Note: If creating a new Website please ensure that the Host Entry has been added to the DNS Server. |
| Step 8: |
Click OK to complete the Website setup; a prompt will be displayed asking if you want to install the Services you can do that now or after the installation process. |
| Step 9: |
The versaSRS Installation Notes page will open in the browser, initiate the versaSRS Database Installation by selecting the versaInstall link (default URL: http://localhost/versaInstall/startup.aspx). |
| Step 10: |
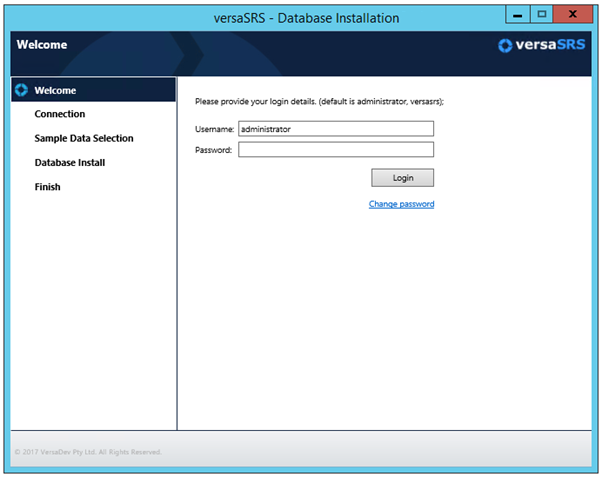
Enter the credentials of the Administrator Account for versaSRS and click Login. For a new installation the default is Administrator, versasrs. |
| Step 11: |
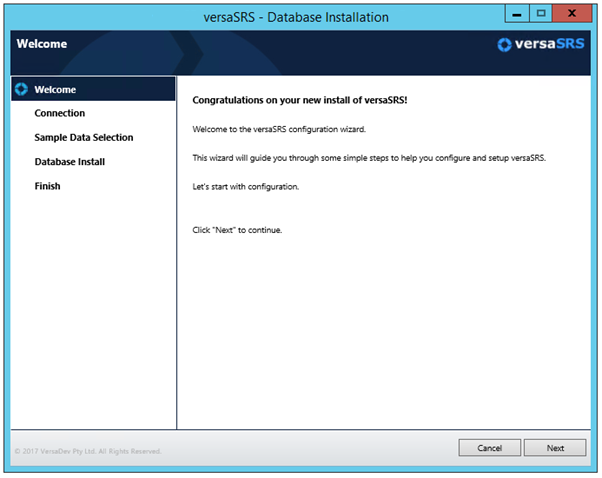
Click Next on the Welcome Screen to continue. |
| Step 12: |
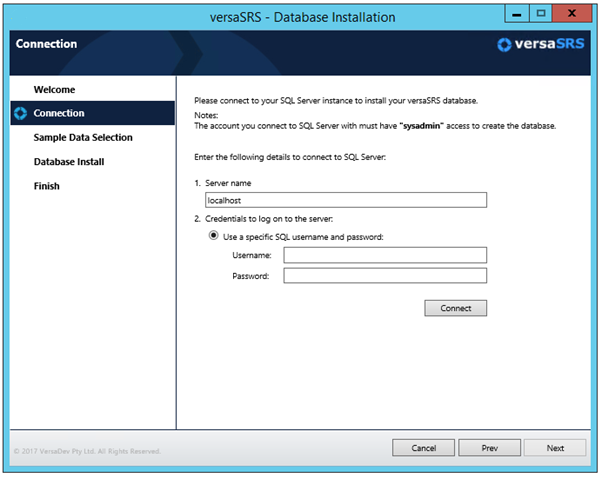
Connect to SQL Server by entering the required credentials. The account used for the initial connection to SQL Server must be a SQL Server Authenticated account that has sysadmin access to create the database. Once the connection has succeeded click Next to proceed. |
| Step 13: |
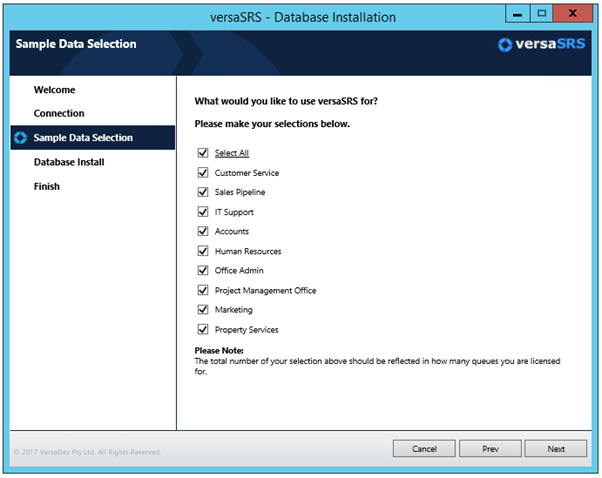
In the Sample Data Selection tab select what you would like to use versaSRS for. This allows the database to be created with existing structures and data based on the selections that are made here. Click Next to proceed. |
| Step 14: |
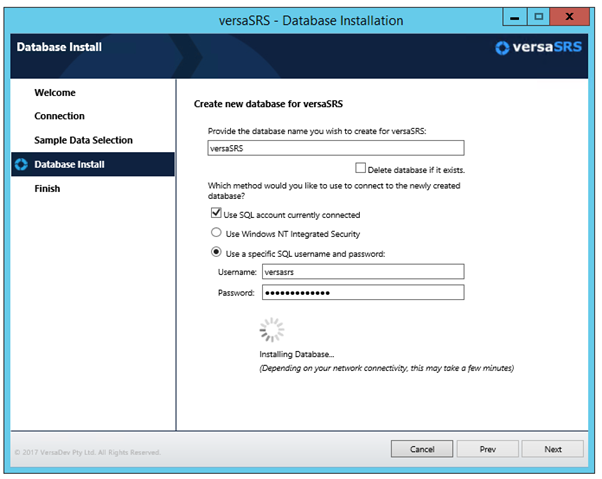
Under the Database Install tab set the necessary information and click Next to install the database. For this step ensure you do not use the built in 'sa' SQL Server account, create a new SQL Server Authentication account or use Windows Authentication to connect to the newly created database. |
| Step 15: |
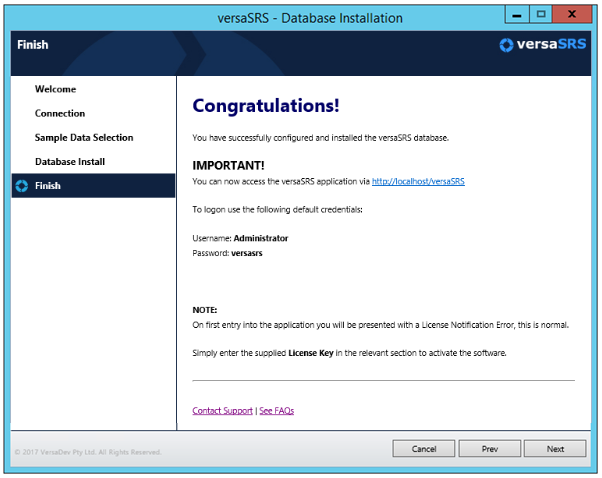
Once the database has been installed successfully you should be able to browse to versaSRS via http://localhost/versaSRS/. Click Finish to complete the installation process. |
License Activation
On the web server where the versaSRS application was installed - open your Web Browser and enter the URL Address: http://localhost/versaSRS/.
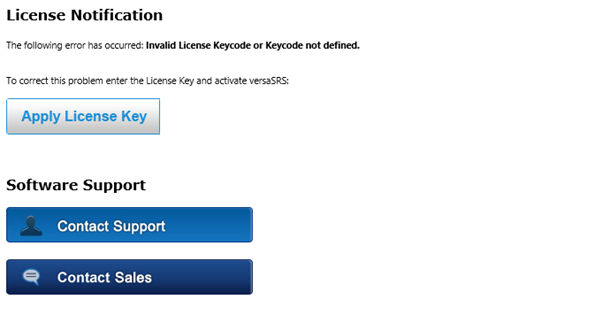
You will be presented with a License Notification screen like this:
| Step 1: |
Click the Apply License Key button. |
| Step 2: |
Enter the versaSRS License Key you have been issued with. |
| Step 3: |
Click the Apply License Key button to launch versaSRS. |
Installing the versaSRS Mail Services
The below services will be installed upon completion of the below steps. A POP3 or IMAP4 account must be configured before versaSRS can send and receive email.
| Step 1: |
In Windows File Explorer locate the versaSRSWindowsServices folder (C:\Program Files (x86)\VersaDev\versaSRSv7\versaSRSWindowsServices) |
| Step 2: |
Right click the installsrs.cmd file and select Run as administrator. |
Installing the versaSRS Service Monitor
The versaSRS Service Monitor will monitor the versaSRS Services and restart them if a stoppage occurs. To install the versaSRS Service Monitor follow the steps below.
| Step 1: |
In Windows File Explorer locate the versaSRSServiceMonitor folder (C:\Program Files (x86)\VersaDev\versaSRSv7\versaSRSServiceMonitor). |
| Step 2: |
Right click the install.cmd file and select Run as administrator. |


