Manage Service Catalogue
SRSConnect can be utilised to grant access to a custom Service Catalogue that allows Requestors to raise specific Cases with the correct versaSRS Team; these are unique and can be created individually to suit the needs of each SRSConnect instance. You can use versaForms in tandem with the Service Catalogue to capture specific data necessary for addressing requests.
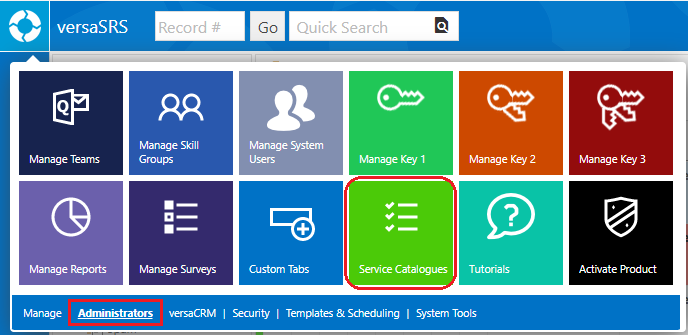
To manage the Service Catalogue(s) select the Service Catalogues icon from within the versaSpinner - Administrators tab.

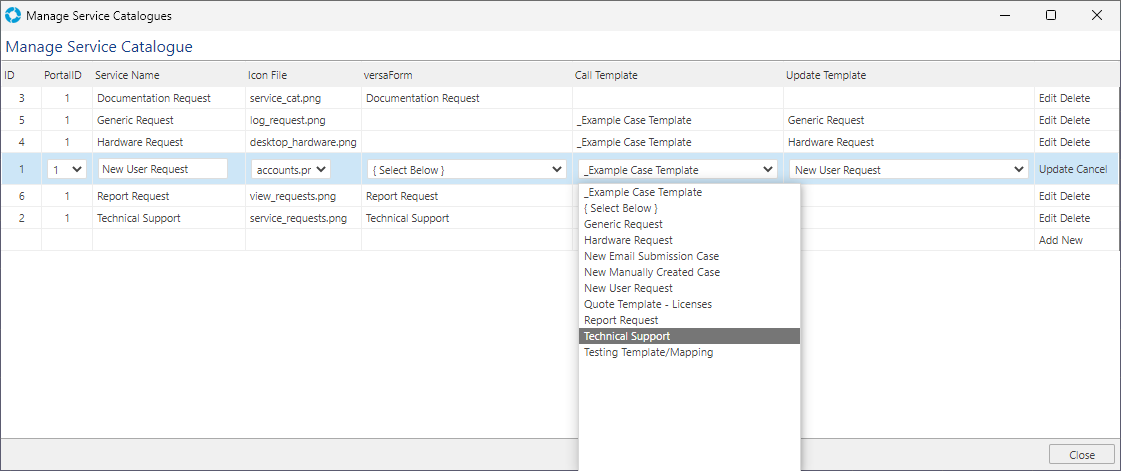
This will display the Service Catalogue list, these are the available versaForms or Case and Update Templates specified for each instance of SRSConnect, here new items can be created or existing ones edited and deleted.

The Manage Service Catalogue window allows the Service Catalogue(s) for single or multiple instances of SRSConnect to be configured using the corresponding PortalID. The Service Name, Icon File, versaForm, or Case and Update Template is specified here.

The Update Template or versaForm will be used to log the request in versaSRS.
Minimum requirements for adding a new Service Catalogue list item are a Service Name and Icon File, if these two details are not specified the list item will not be created correctly.

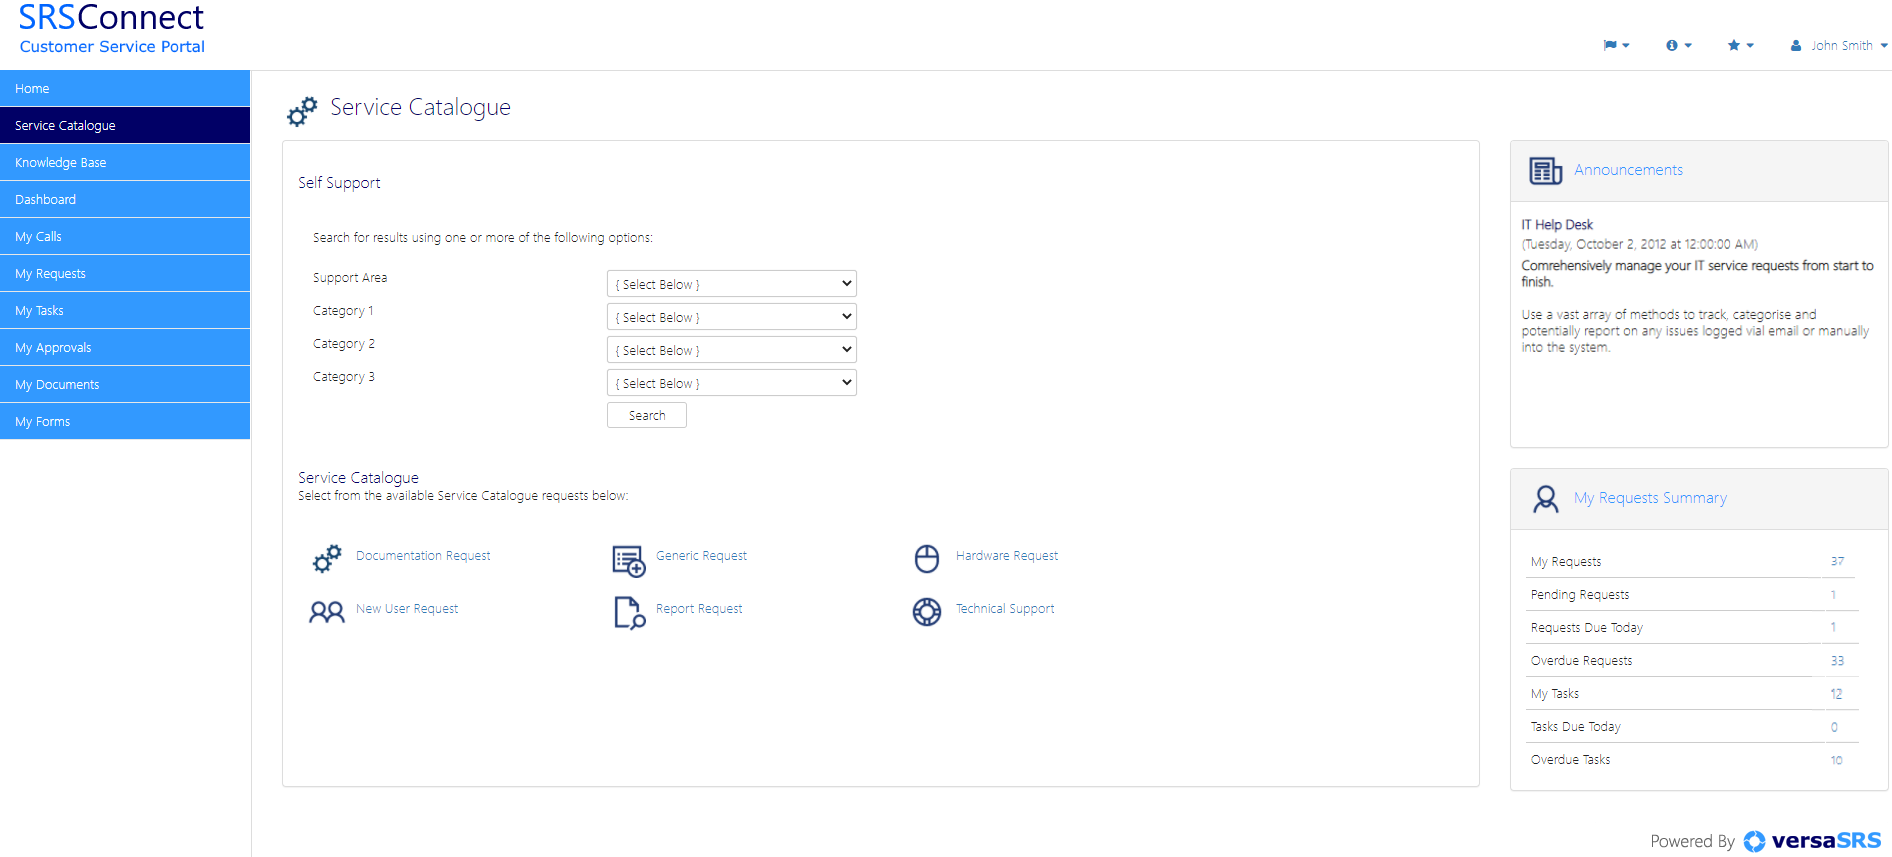
When configured the Service Catalogue associated with the SRSConnect instance can be viewed within SRSConnect under the Service Catalogue tab.

Adding Icon Files
If you wish to add a new Icon File to the available options you need to add the correct image file to the SRSConnect images folder, the default path of this folder is C:\Program Files (x86)\VersaDev\versaSRS\SRSConnect\images.
Add the Icon by accessing the System Tables, selecting Service Catalogue Icons from the Available Tables drop-down list, entering the name of the image file in the text box, then clicking Add.
Note: When adding icons you need to include the file format extension of the image; you can only use PNG, GIF, or JPEG image files. For best results ensure image file dimensions are at minimum 48px by 48px.
![]()