Workflow
Video Tutorial
Overview
A structured Workflow can be created for Tasks in versaSRS. It allows a Successor Task to be triggered based on completion of a Predecessor Task.
Workflow can be created directly on a Record (Case/Problem/RFC) by adding Tasks in the Tasks tab or a Template can be created with an existing Workflow that can be applied to Records as required. The below instructions are specific to creating Workflow for a Case.
Creating a Workflow Template
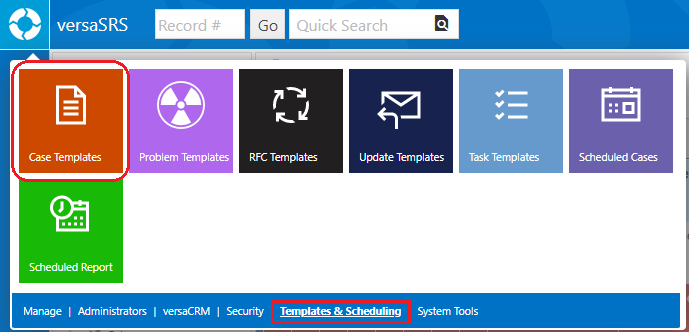
1. Select the versaSRS Spinner icon and under the Templates & Scheduling tab click the Case Templates option.
2. Create a new Case Template or Edit an existing one
3. On the Case Template select the Tasks tab and add Tasks by clicking the Select button and choosing the Tasks to add. These Tasks are the existing Task Templates, you will need to ensure the required Task Templates have been created prior to creating the Workflow Template.
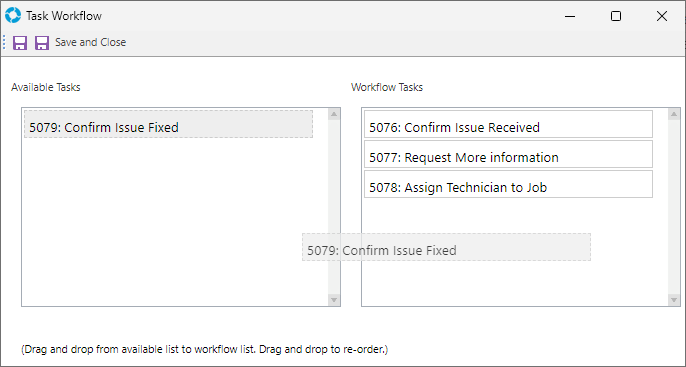
4. Once the required Tasks are added, set the Workflow order for the Tasks by clicking the Workflow button. Drag the required Tasks into the Workflow Tasks box, the Task that appears first in this list will be the first one in the Workflow.
5. Click the calendar icon  to the left side of each Task to set the Task Logged and Due Dates. The dates are specified relative to other dates from the Task or Parent Record.
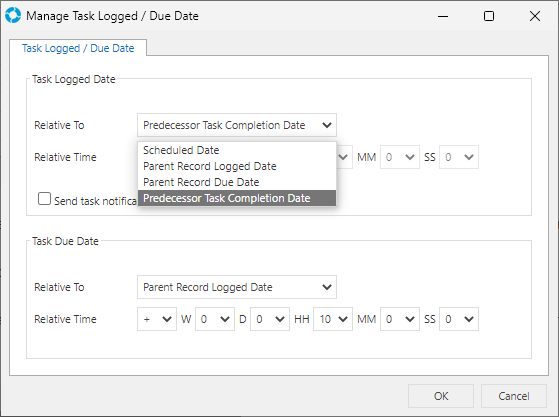
The Task Logged Date can be set relative to Scheduled Date, Parent Record Logged Date, Parent Record Due Date and Predecessor Task Completion Date.
The Task Due Date can be set relative to Parent Record Logged Date, Parent Record Due Date and Task Logged Date.
| Relative To | Description |
|---|---|
| Scheduled Date | The date the Task was created |
| Parent Record Logged Date | The date and time the Parent Record (the Case, Problem, or RFC the Tasks belong to) was logged to versaSRS |
| Parent Record Due Date | The due date of the Parent Record (the Case, Problem, or RFC the Tasks belong to) |
| Predecessor Task Completion Date | The date and time the previous Task was Completed. This option is not available for the first Task in the Workflow |
| Task Logged Date | The date and time the Task was logged to versaSRS |
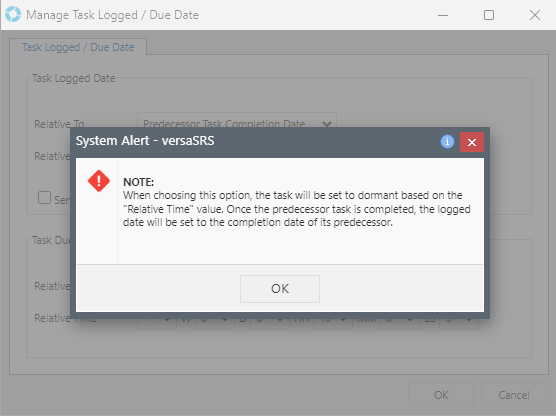
Note: Setting the Task Logged Date to be relative to Predecessor Task Completion Date will cause the Task to go into a dormant state until the predecessor is complete, as advised by the warning message that will be displayed.
Applying Workflow to a Case
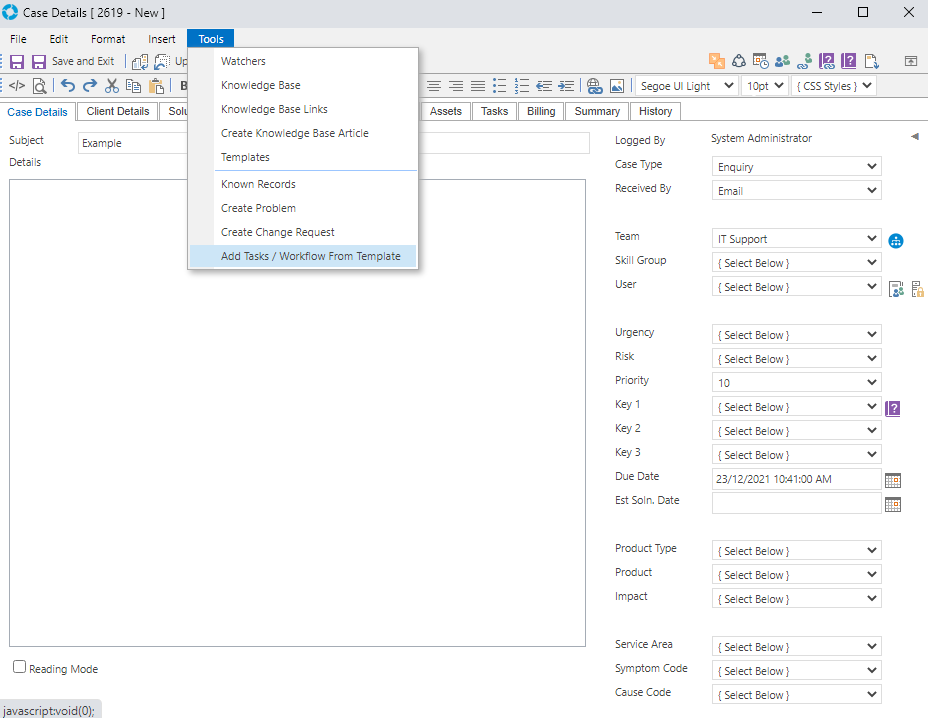
1. Open a Case and within the Case click Tools >> Add Tasks / Workflow from Template.
Use the alphabet navigator to find the appropriate Workflow Template.

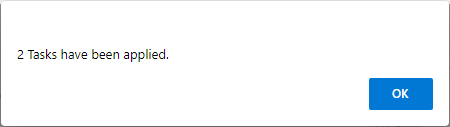
Select a Template and click 'Apply'.
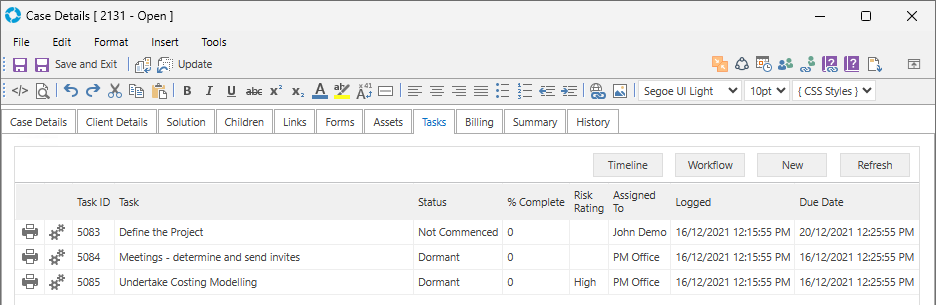
2. Browse to the Tasks tab to view the applied Workflow.
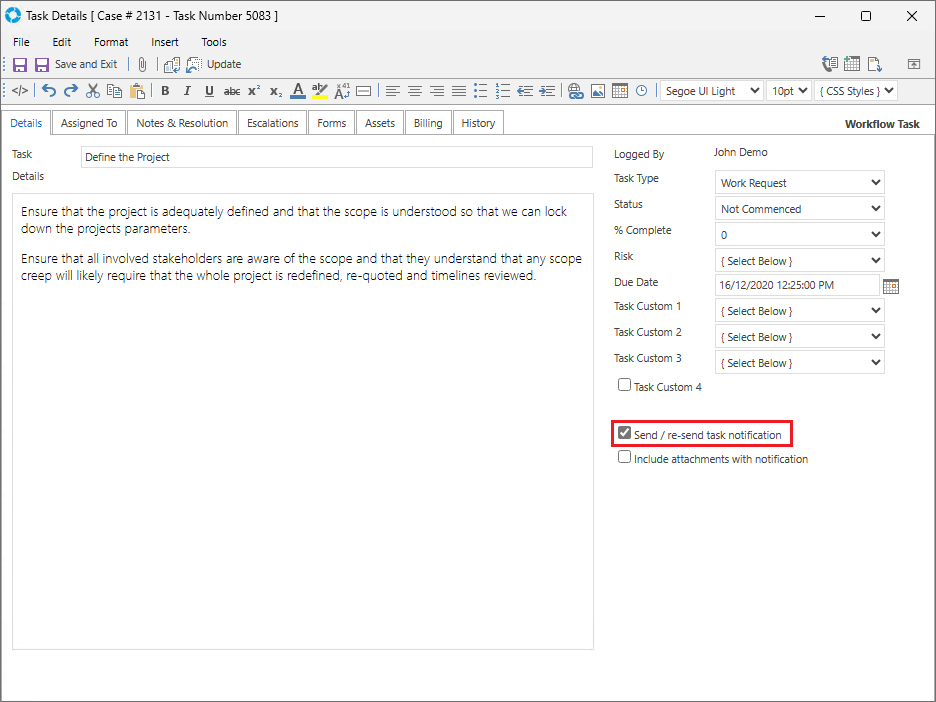
Open the first Task and tick the "Send / re-send task notification" checkbox; Save & Close the Task. A Task notification will go to the Assigned To email address/Distribution Group which will initiate the workflow.