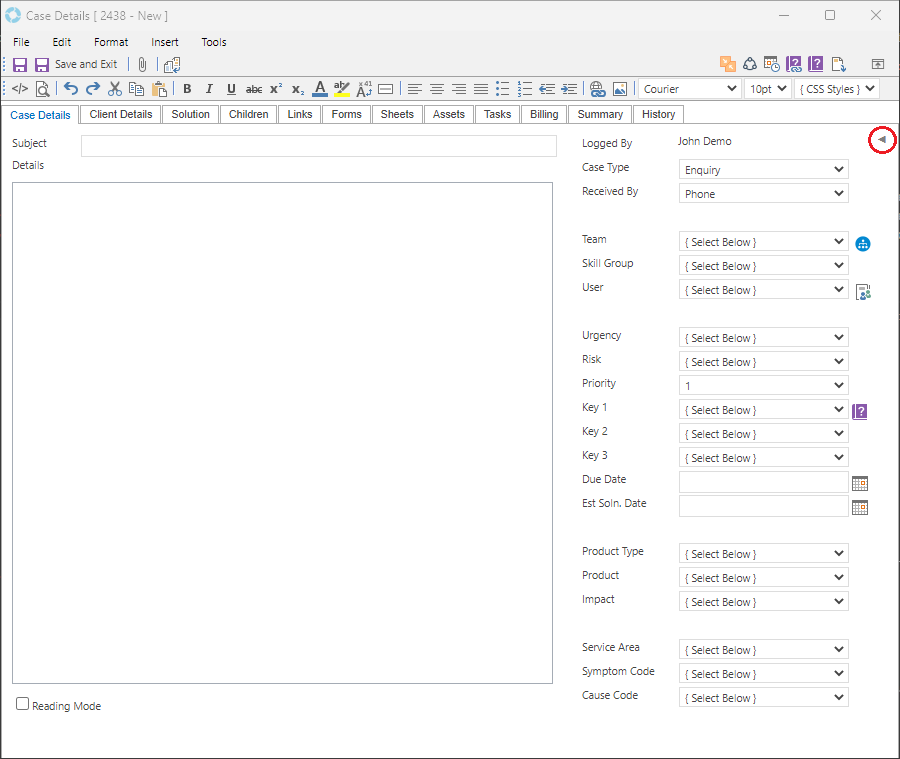
Categorising a Record
When creating a New Record (Case/Problem/RFC) or when a New Case is logged by email, it can be categorised in many different ways. The following steps outline how this can be done within a Case:
- On a new Case on the right side there are the categorisation options. Click the Case Type drop-down menu and select an appropriate Case Type from the list.
- Click the Received By drop-down menu and select the appropriate option. This will often be set by default for example if the Case is created via email then the email option would be selected.
- Next select the Team drop-down menu. The Team is a high level category that specifies where the Case resides and also drives what Users will have access to it and what options will be available in some of the following categories on the Case.
- After setting the Team, the Skill Group options for that Team will be populated in the Skill Group drop-down menu. Selecting the appropriate Skill Group will then populate which Users are assigned to that Group and can be assigned the Case.
- Select the User from the available Users in the User drop-down menu. This is the person that will be assigned the Case.
- The next two drop-downs, Urgency and Impact, are optional and can be set for the Case if necessary.
- Select the Priority of the Case. The Priority will drive the Due Date, and is based on the Priority Settings for the Team that is selected.
- Key 1, Key 2, and Key 3 are optional hierarchical categories meaning that the Key 1 selection will drive the available Key 2 options, and the Key 2 selection will drive the available Key 3 options. The Key Set is specified in the Team Settings.
- The Due Date is automatically populated based on the Priority that is selected, however it can be overridden with a specific date if required. To override the Due Date select the date picker icon and choose the date and time to set.
- The Est Soln. Date is an option date field that can be set if required. It is used to estimate the date of the solution to the Case and therefore a comparison can be made between the actual Due Date and the Estimated Solution Date.
- The other six Categories (Product Type, Product, Impact, Service Area, Symptom Code, and Cause Code) are optional drop-down lists that can be set if required.
The System Labels and available options in each drop-down menu are fully customisable to allow flexibility for the specific needs of each Business; because of this yours may be different than those discussed above.
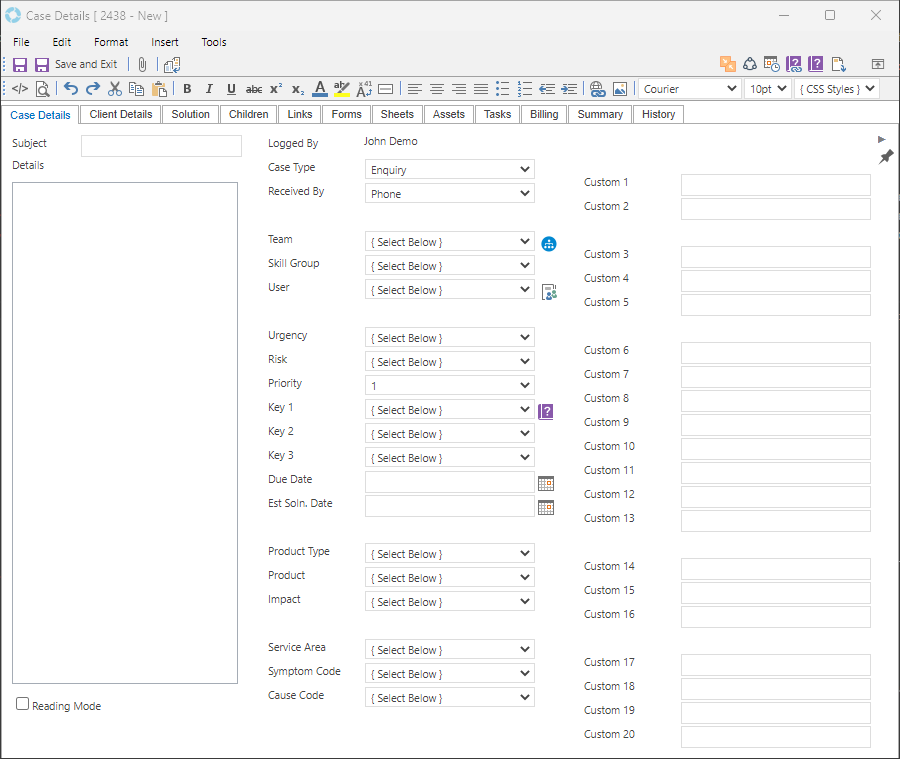
Further categorisation can be done with Custom Free Text fields that are available by clicking the Arrow Icon next to the Logged By field at the top right of the Case.